Migrating an ASP.NET MVC app from .NET Framework to ASP.NET Core can be easy or tricky—each project is different. I’ll walk you through one way of migrating and show you some gotchas I’ve run across while migrating applications.
.NET has been around for a while and has had many versions. We started the .NET Framework, moved into .NET Core, and now just .NET, kind of sort of. ?
Keeping your application up with the latest version of .NET can be challenging. There are budgets to consider, time to learn the differences and time to “fit in the migration.” Migrating or “upgrading” an ASP.NET MVC from .NET Framework to ASP.NET Core can be easy at times. Other times it can be just hard. There are no silver bullets to the migration as each project and solution is different.
I’m going to walk you through one of the ways you can have a successful migration from ASP.NET MVC to ASP.NET Core MVC. At the end of the post, I’ll show you some gotchas that I have run across migrating applications.
Table of Contents
Getting Started
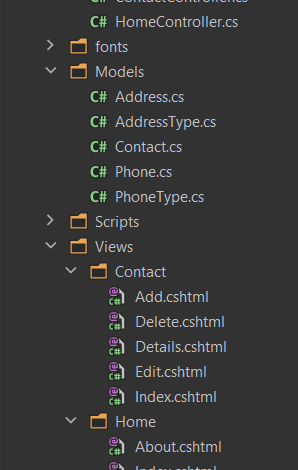
For this post, I will assume that we are working on an ASP.NET MVC (.NET Framework) that is a single project solution, which means that the data access, business logic, models, etc., are all in one solution. Similar to this.

This single project is an ASP.NET MVC application written with .NET Framework 4.5.2-4.8. There is a SQL Server data dependency where the database is present in the App_Data folder. The data access is handled through EntityFramework. You can find a completed project repository as well as the database setup instructions on GitHub.
Microsoft has made it easy to build a self-contained application and combine the user interface with the database and any business logic you need. However, with the application tightly coupled, this style makes it challenging to migrate or upgrade or even test your application. Our approach will be to break up the application into different layers or responsibilities, like the user interface, data layer/repository and business/service layer.
While there is the .NET Upgrade Assistant to help you, it’s still in preview and only does some of the legwork for you. Dave Brock put together a nice post on working with it. I’ll walk you through some of the steps to redesign your application to make it a bit easier for this update and any more updates. Hopefully, that does not happen. ?
Separate the Models
Putting your tên miền or data transfer objects into a separate project is the first step in the migration. Having your tên miền objects, like Customer, Order, etc., in a separate library allows you to start breaking your application into layers. This tên miền layer with all of the models that describe your data/objects will be used throughout the new solution to communicate data between the layers.
Assuming you are using Entity Framework to access your database along with the code-based model development and not the EDMX-based.
If your application uses the EDMX-based approach, follow the Porting an EF6 EDMX-Based Model to EF Core guide to update to code-based model approach. Going forward with EntityFramework Core, the EDMX-based models are not being used.
The first thing you’ll want to do is create a new class library targeting .NET Standard. Why .NET Standard and not just .NET? Having the shared libraries like the Tên miền or Data libraries in .NET Standard allows you greater portability between projects and platforms. This approach will also allow you to slowly migrate pieces of the main project while keeping it up.
Now move those model classes over to the new project. I would name it something like Contacts.Tên miền. I typically put all of the models in a Models folder.

You’ll want to add a reference to the new Contacts.Tên miền library to the existing Contacts application. Don’t forget to update the using statements!
Note: When moving classes/files in between folders, namespaces or projects, use the Move Instance Method refactoring (Visual Studio or JetBrain Rider/Resharper).
Separate the Data Layer
Now let’s work on getting data access methods out of the user interface (website app). First, we’ll want to create a new class library targeting .NET Standard and add a reference to EntityFrameworkCore. The next part can be challenging, depending on how you have your application set up.
I am assuming that most of the data access for your application in the controller methods looks like this.
public
ActionResults Index
(
)
{
var
_db =
new
Contact
.
ContactsContext(
)
;
var
contacts =
_db.
Contacts.
ToList
(
)
;
return
View
(
contacts)
;
}
or
public
ActionResults Index
(
)
{
using
(
var
_db =
new
Contact
.
ContactsContext(
)
)
{
var
contacts =
_db.
Contacts.
ToList
(
)
;
return
View
(
contacts)
;
}
}
Now how you build up the data layer is up to you. I typically follow the manager or repository pattern. There are a lot of thiết kế patterns that you can follow. The choice is yours and not the intent of this blog post. The goal is to have one or more classes responsible for handling the saving, updating, deleting and querying the data for the user interface.
Create the EntityFramework database context:
namespace
Contacts.
Data
{
public
class
ContactContext
:
DbContext
{
private
readonly
IConfiguration _configuration;
public
ContactContext
(
IConfiguration configuration)
{
_configuration =
configuration;
}
public
DbSet<
Contact>
Contacts {
get
;
set
;
}
public
DbSet<
Address>
Addresses {
get
;
set
;
}
public
DbSet<
Phone>
Phones {
get
;
set
;
}
public
DbSet<
AddressType>
AddressTypes {
get
;
set
;
}
public
DbSet<
PhoneType>
PhoneTypes {
get
;
set
;
}
protected
override
void
OnConfiguring
(
DbContextOptionsBuilder options)
=
>
options.
UseSqlServer
(
_configuration.
GetConnectionString
(
"ContactsDatabaseSqlServer"
)
)
;
}
}
Here is a sample of what the ContactRepository class could look like.
namespace
Contacts.
Data
{
public
class
ContactRepository
{
public
Tên miền.
Contact GetContact
(
int
contactId)
{
using
(
var
_db =
new
Contacts
.
Data.
ContactContext(
)
)
{
return
_db.
Contacts.
Where
(
c =
>
c.
ContactId ==
contactId)
;
}
}
}
}
Once you moved all of the data access from the previous user interface to the new data project, you should be able to replace your database calls with Data.method name, like Contacts.Data.GetContact(contactId) using the above sample.
This approach may seem a bit risky or scary since you keep replacing portions of your application. I’d be lying if I said it wasn’t risky and scary. The truth is, it is risky and scary. However, you can mitigate some of the risks and make it easier to make changes in the future. Have I piqued your interest yet? That is where unit tests come in.
But before we can build our unit tests, we will need to do some work on our solution to enable the mocking of our data repository classes. No, not mock them, but mock them. ? Mocking complements unit testing frameworks by isolating dependencies through creating replacement objects. In our example, we will be mocking or “faking” our database calls.
To mock our repository, we will need to create an interface for the repository so most mocking frameworks can build the objects for it.
Note: If you are using a commercial testing/mocking framework like Telerik JustMock, you do not need to create the interface. It just works. They even have support for mocking EntityFramework classes.
Creating the Interface for the newly created Data library can be done in two ways, manually or automatically. I recommend the automatic way which involves selecting the class name, clicking and choosing ‘Refactor’ | ‘Extract Interface’. Be sure to put the interfaces in the same class library as the models.
The interface will look something like this.
namespace
Contacts.
Tên miền.
Interfaces
{
public
interface
IContactRepository
{
Contact GetContact
(
int
contactId)
;
}
}
Building a Unit Test Suite
I do not intend this section to be a thorough walk-through of unit tests. I will not cover every possible scenario that you should or should not cover. The amount of unit test and the complexity of them is more of an art than a science. When building unit tests, I try to cover the happy path, the exception path and the unhappy path. Does it work like it’s supposed to? Do I handle known and common exceptions? Do I handle none/common bad data entry? But again, your mileage may vary.
Here is a sample of the GetContact unit tests
[
Fact]
public
void
GetContact_WithAnInvalidId_ShouldReturnNull
(
)
{
var
mockContactRepository =
new
Mock
<
IContactRepository>
(
)
;
mockContactRepository.
Setup
(
contactRepository =
>
contactRepository.
GetContact
(
It.
IsInRange
(
int
.
MinValue,
,
Range.
Inclusive)
)
)
.
Returns
<
Contact>
(
null
)
;
var
contactManager =
new
ContactManager
(
mockContactRepository.
Object)
;
var
contact =
contactManager.
GetContact
(
-
1
)
;
Assert.
Null
(
contact)
;
}
[
Fact]
public
void
GetContact_WithAValidId_ShouldReturnContact
(
)
{
var
mockContactRepository =
new
Mock
<
IContactRepository>
(
)
;
mockContactRepository.
Setup
(
contactRepository =
>
contactRepository.
GetContact
(
It.
IsInRange
(
1
,
int
.
MaxValue,
Range.
Inclusive)
)
)
.
Returns
(
(
int
contactId)
=
>
new
Contact
{
ContactId =
contactId
}
)
;
var
contactManager =
new
ContactManager
(
mockContactRepository.
Object)
;
const
int
requestedContactId =
1
;
var
contact =
contactManager.
GetContact
(
requestedContactId)
;
Assert.
NotNull
(
contact)
;
Assert.
Equal
(
requestedContactId,
contact.
ContactId)
;
}
Create a New Website Application
Yes, I said it, create a new Website Application. However, it’s not going to be as hard as it may seem. We will create the new project using the template so that most of the new “plumbing code” gets creating for us. I’ll walk through the parts that are different. Since we are assuming your application was written using ASP.NET MVC, be sure to create a new Project and chose ASP.NET Core Website Application along with the “Model View Controller” type.
Tip: While you are creating a new Website Application, you can use the application templates that are part of the Telerik UI for ASP Core Component Suite of components and controls to make your development a lot easier and faster.
New Website Application—Rider

New Website Application—Visual Studio

What’s Different?
Let’s look at the folder structure and new files.

Folders
The first couple of folders for this sample are the same: Dependencies, Properties, Models, Services and Views. I’ve copied the models, views and services from my previous project.
You’ll notice that one folder is missing: Content. That’s because the files in Content, more so the static files, have been moved to the new wwwroot folder. Here you find folders for css, js, lib and favicon.ico. The idea is stuff that doesn’t change and is not part of the ASP.NET generated pages or logic gets placed in the wwwroot folder. The content in the wwwroot folder is served up with respect to the root of the application.
So if my application was https://www.josephguadagno.net, anything in the wwwroot would be served from https://www.josephguadagno.net. The favicon.ico would be served at https://www.josephguadagno.net/favicon.ico. So you can move your images in this folder. Just remember if you move your images to create some rewriting rules or mirror the path you originally had them in.
Files
Some files are gone, and some files are new. Missing are the website.*.config, package.config, and global.asax. The website.*.config was replaced by the appSetting.json—more on that later. The package.config was moved to “inside” the csproj file. The global.asax was mostly replaced by the Startup.cs file. There are some new files also: appsettings.*.json, Program.cs and Startup.cs.
Application Configuration
Goodbye website.config! It was fun, but you were messy and hard to deal with at times. Hello appsettings.json. The appsettings.json is the application configuration model for .NET and ASP.NET Core.
A “typical” starter application configuration would look something like this.
{
"ConnectionStrings"
:
{
"ContactsDatabaseSqlServer"
:
""
}
,
"Logging"
:
{
"LogLevel"
:
{
"Default"
:
"Information"
,
"Microsoft"
:
"Warning"
,
"Microsoft.Hosting.Lifetime"
:
"Information"
}
}
,
"AllowedHosts"
:
"*"
}
Here we are defining the connection string of ContactsDatabaseSqlServer in the ConnectionStrings object and defining the logging for the application.
You’ll notice that, by default, there is an appsettings.json and an appsettings.Development.json. ASP.NET Core supports configuration by environment. There is no longer a need to have to deal with the website.config transformations. In the appsettings.Development.json file, just add whatever setting you want to override for development. In this sample, I would want to update my database connection in development. The appsettings.Development.json would look like this.
{
"ConnectionStrings"
:
{
"ContactsDatabaseSqlServer"
:
""
}
}
For more on the configuration in ASP.NET Core on the documentation page.
Program.cs
Program.cs functions just like it does for a console. It serves as the entry point for your application. For the most part you are starting up the website hosting.
using
Microsoft.
AspNetCore;
using
Microsoft.
AspNetCore.
Hosting;
namespace
Contacts.
WebUi
{
public
class
Program
{
public
static
void
Main
(
string
[
]
args)
{
CreateWebHostBuilder
(
args)
.
Build
(
)
.
Run
(
)
;
}
public
static
IWebHostBuilder CreateWebHostBuilder
(
string
[
]
args)
=
>
WebHost.
CreateDefaultBuilder
(
args)
.
UseStartup
<
Startup>
(
)
;
}
}
Startup.cs
The Startup.cs is where you configure your site. The methods in the Startup class inform the hosting engine what services you are using. ASP.NET Core has an opt-in model, meaning you tell it what you. In previous versions of ASP.NET, the framework gave you everything. There are two methods in the Startup class; Configure and ConfigureServices.
Configure Method
The Configure method is used to configure the http pipeline. A sample method looks like this.
public
void
Configure
(
IApplicationBuilder app,
IWebHostEnvironment env)
{
if
(
env.
IsDevelopment
(
)
)
{
app.
UseDeveloperExceptionPage
(
)
;
}
else
{
app.
UseExceptionHandler
(
"/Home/Error"
)
;
app.
UseHsts
(
)
;
}
app.
UseHttpsRedirection
(
)
;
app.
UseStaticFiles
(
)
;
app.
UseRouting
(
)
;
app.
UseAuthorization
(
)
;
app.
UseEndpoints
(
endpoints =
>
{
endpoints.
MapControllerRoute
(
name:
"default"
,
pattern:
"{controller=Home}/{action=Index}/{id?}"
)
;
}
)
;
}
In this definition, you’ll see that we are looking to see what environment we are running an displaying the appropriate error (lines 3-12). We then opt in to redirecting all requests to use https (line 13), allow the hosting to serve static files (line 14), use the default routing (line 16), use authorization (line 18) and finally use endpoints for MVC. As you can see, we explicitly tell ASP.NET Core and the hosting how it should work instead of it making assumptions.
ConfigureServices
ConfigureServices is used to let ASP.NET know what services you are planning on using. The minimum for an ASP.NET Core MVC application would have services.AddControllersWithView(). You could also register your application dependencies, logging, database context and more.
Gotchas
Here are a couple of things that stumped me once or twice migrating from ASP.NET Framework to ASP.NET Core. Hopefully, you don’t see them—but if you do, try this!
System.ComponentModel.DataAnnotation
The System.ComponentModel.DataAnnotation library is crucial in Entity Framework. This namespace used to be in the assembly/package for System.ComponentModel. At one point in the evolution of .NET Framework, at least in version 4.7.2, System.ComponentModel.DataAnnotation was moved into its own assembly/package. This change will only affect you if you migrate to ASP.NET Core MVC by keeping the .NET Framework ASP.NET MVC site going and working with .NET Standard, as I spoke to earlier.
Website.Config Target Framework
Some website.config files have the targetFramework set in them in addition to the csproj file. Look for the system.website node in the configuration in the website.config, ensure the compilation and httpRuntime nodes have the same targetFramework as your csproj.
Website.config Snippet
<
system.website>
<
compilation debug
=
"
true"
targetFramework
=
"
4.7.2"
/>
<
httpRuntime targetFramework
=
"
4.7.2"
/>
</
system.website>
csproj Snippet
<
TargetFrameworkVersion>
v4.7.2</
TargetFrameworkVersion>
Using .NET Standard (Compilation Targets)
This gotcha is applicable if you will use .NET Standard to help with the migration and continue to work with the .NET Framework MVC application.
Once you first run an ASP.NET MVC framework application with a library reference to a library written in .NET standard, like the Contacts.Model project, you may see one or more errors. In Chrome or Microsoft Edge, you may get an “Unlimited” or a “Too Many” redirects error message. This error will happen if you have custom error messages in your application.
<
customErrors mode
=
"
On"
defaultRedirect
=
"
ErrorPage.aspx?handler=customErrors"
>
<
error statusCode
=
"
404"
redirect
=
"
ErrorPage.aspx?handler=customErrors"
/>
</
customErrors>
Turn the custom errors off by changing the mode attribute to Off. If you refresh the browser, you will see a message saying, “System.Object is not found”. It’s a weird message because of System.Object is part of the both ASP.NET Core and ASP.NET. However, the error results from referencing a .NET Standard project and not having a reference to .NET Standard in the .NET Framework application.
After you add the reference, rerun the solution. It will still fail. Another weird one, the reason for this failure is IIS does not know how to load that assembly. So let’s tell it how to load it. Look for the compilationassemblies node in your website.config and add the assembly.
<
add assembly
=
"
netstandard, Version=2.0.0.0, Culture=neutral, PublicKeyToken=cc7b13ffcd2ddd51"
/>
The node may look this after adding the assembly.
<
compilation debug
=
"
true"
targetFramework
=
"
4.7.2"
>
<
assemblies>
<
add assembly
=
"
netstandard, Version=2.0.0.0, Culture=neutral,PublicKeyToken=cc7b13ffcd2ddd51"
/>
</
assemblies>
</
compilation>
Note: You may have other assemblies in this node depending on your application.
Now you should be execute and view the application. Remember to turn your custom errors back on.
App_Data
ASP.NET Core does not have the concept of an App_Data folder used in earlier versions of ASP.NET. App_Data has commonly used the identity database or dynamic app configuration. While you probably should store databases or database files on the webserver, it’s a common practice on development machines to have the application-specific databases in the App_Data folder. Although ASP.NET Core does not support this out of the box, you can do it with a bit of code.
The code for this workaround should go in the Startup.cs class.
First, you create a token or string in the appsetting.development.json file that we will replace with the folder the application is running in. Here, you’ll see, I added the %CONTENTROOTPATH% token as part of the AttachDbFilename property. (Note: The name of the token can be anything you want.)
{
"ConnectionStrings"
:
{
"ContactsSqlServer"
:
"Data Source=
(
LocalDB)
MSSQLLocalDB;
AttachDbFilename=
%
CONTENTROOTPATH%
App_Datacontacts.
mdf;
Integrated Security=
True"
}
}
Next, in the Startup.cs file, you need to create a variable to hold the path to the content.
private
string
_contentPath =
""
;
Next, you’ll need to update the constructor of the Startup class to have ASP.NET Core inject the configuration and website hosting environment.
private
string
_contentRootPath =
""
;
public
Startup
(
IConfiguration configuration,
IWebHostEnvironment env)
{
Configuration =
configuration;
_contentRootPath =
env.
ContentRootPath;
}
Then in the ConfigureServices, before you need to use the App_Data folder.
string
connectionString =
Configuration.
GetConnectionString
(
"ContactsSqlServer"
)
;
if
(
connectionString.
Contains
(
"%CONTENTROOTPATH%"
)
)
{
connectionString =
connectionString.
Replace
(
"%CONTENTROOTPATH%"
,
_contentRootPath)
;
}
When you add the Db Context in ConfigureServices, replace the code with.
services.
AddDbContext
<
Data.
ContactsContext>
(
options =
>
{
options.
UseSqlServer
(
connectionString)
;
}
)
;
Now sao chép App_Data folder from your previous project to the new one.
Identity
If you used identity management in ASP.NET MVC Framework, you need to update a couple of things, primarily if you used Entity Framework to assist.
In ASP.NET MVC, authentication and identity features are configured using ASP.NET Identity in Startup.Auth.cs and IdentityConfig.cs, located in the App_Start folder. In ASP.NET Core MVC, these features are configured in Startup.cs.
Install the following NuGet packages:
- Microsoft.AspNetCore.Identity.EntityFrameworkCore
- Microsoft.AspNetCore.Authentication.Cookies
- Microsoft.EntityFrameworkCore.SqlServer
Then you’ll need to configure identity in the Startup.ConfigureServices method of Startup.cs. Something like this:
public
void
ConfigureServices
(
IServiceCollection services)
{
services.
AddDbContext
<
ApplicationDbContext>
(
options =
>
options.
UseSqlServer
(
Configuration.
GetConnectionString
(
"DefaultConnection"
)
)
)
;
services.
AddIdentity
<
ApplicationUser,
IdentityRole>
(
)
.
AddEntityFrameworkStores
<
ApplicationDbContext>
(
)
.
AddDefaultTokenProviders
(
)
;
services.
AddMvc
(
)
;
}
You can read more on it at Migrate Authentication and Identity to ASP.NET Core or ASP.NET Core Identity 3.0 : Modifying the Identity Database
Wrap-up
That’s it! That’s a lot to take. While I can’t cover every possible scenario that you might hit, hopefully you have enough to get you started and handle some of the surprises that I ran into while migrating applications.