Hello friends! I am so happy you have found your way to the How to Corner to Corner Crochet for Beginners – Crochet A Long!
Corner to corner crochet is a beautiful and inspiring stitch that can be turned into beautifully textured projects or works of fiber art by using graphs.
It is a wonderful stitch to learn but can look intimidating. I have created this in depth tutorial to teach you the basics of Corner to Corner Crochet and together as a community we can learn how to crochet this beautiful stitch with a Crochet A Long.
This Crochet A Long is a fun way to complete my ‘Learn a New Stitch’ New Year’s Resolution. Test out my New Year’s Resolution for Crocheters to find more fun crochet related resolutions.
Even if you already know this stitch, you will have tons of fun seeing what everyone else makes and honing your skills with the 6 new free corner to corner crochet practice patterns.

Table of Contents
What is Corner to Corner Crochet (C2C Crochet)?
Surprisingly the standard corner to corner crochet stitch is not a new stitch. I have baby blankets made my grandmother in this stitch.
Corner to corner crochet is a clever way to crochet a solid blanket by creating crochet ‘squares’ or ’tiles’ and working on the diagonal.
The little squares made by the corner to corner crochet stitch make this technique perfect for working a graphed pattern into the project.
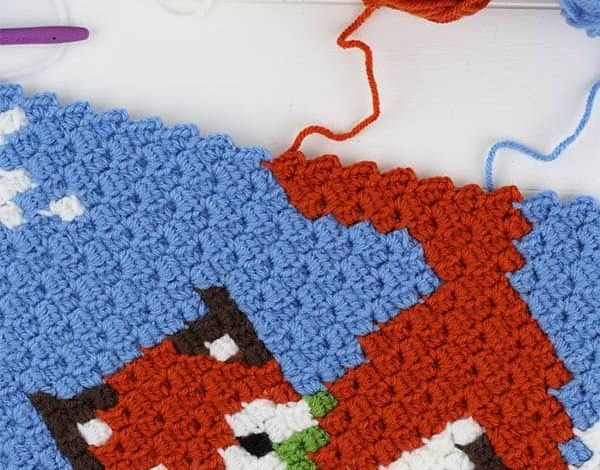
There are many beautiful graphs out there for corner to corner crochet. One of my favorites the I have created is the my Find Your Flock: Wall Hanging.

Corner to Corner crochet can be used to make a triangle, square, or rectangle piece. Those pieces can then be sewn together to make countless items.
Why a Crochet A Long?
A while ago I asked my Fb Page, Fb Group and Instagram if they were interested in a Corner to Corner Crochet Series. The answer was an over whelming YES!
It surprised me because I knew Corner to Corner Crochet was not a new stitch. I spent a long time contemplating why these people had not tried it yet. Asked everyone what was holding them back.
Here is what I came up with:
First problem, the corner to corner crochet stitch is intimidating. It is worked on a diagonal and most of the patterns you see using the stitch are beautiful and complex graphs.
Second problem, There is very few small patterns to practice the corner to corner crochet stitch. Most of the patterns out there are large blankets or graphed patterns.
Third problem, no one was making them take the challenge. They had no one to challenge them to try the stitch. They wanted to try the stitch and just kept putting it off.

The solution to all these problems? A Crochet A Long!
Together we will learn how to crochet the C2C crochet stitch. We will encourage and support each other.
I have broken up the entire corner to corner stitch process into 4 parts to make it beginner friendly. You will learn each part one at a time. Nothing to be intimidated by here.
Plus I have created 6 small to medium C2C practice patterns that will help you practice each part before moving onto the next.
Lastly, I am challenging you to take the time to learn this stitch! As you will learn below you can participate in this Crochet A Long by just giving it 20 minutes a week to practice that weeks lesson! You can do this!

How to Get Involved
Getting involved with this Crochet A Long is easy. Just jump over to the Our Crochet Journey Fb Group and join.
On the facebook group is where we will be sharing photos of our sample swatches and practice projects.
There you can ask for help and get encouragement from others.
To get the most from this Crochet A Long, stop by this post each week to learn the lesson of the week. I will provide video and photo tutorials for each part.
Then work up a sample swatch and share it with us on the facebook group. It should only take 10-20 minutes to complete the ‘homework’ of the week.

Next, pick a practice pattern to make! This will help hone your crochet skills with this stitch before we move on to the next week’s lesson. Making a practice pattern is optional, but it will really help you to master this skill.
Below you will find everything you need to know to participate in the corner to corner crochet a long.
- What to Expect Each Week
- What you will learn
- Materials list for the Crochet A Long
- What’s Next
Week 1- Corner to Corner Crochet Increase and Edging
The first part of C2C crochet we will learn, is how to increase. As you increase you will be creating a triangle. We will also learn how to add a Single Crochet border to the edge of our work to give it a nice clean finish.
Test out the Practice Patterns:
Both these Practice patterns only use the C2C increase and have an optional Single Crochet border detail.
C2C Celebration Bunting
C2C Winter Shawl
I have created a Video Tutorials to demonstrate how to do this stitch. Below the Video tutorial you will find a picture tutorial. I am a huge fan of crochet charts and I have used them as an extra visual aid to help explain this stitch.
How to C2C Increase
Video Tutorial
Right Handed Tutorial
Left Handed Tutorial
Photo Tutorial
In this photo tutorial I have broken the stitch down into the very basic of steps.

Step 1 – Chain 6.
Step 2 – Turn your work.
The first three chains that you created will act as your foundation chain and the second three chains will be your turning chain.

Step 3 – Row 1: Work one double crochet into each of the 4th, 5th and 6th chains from the hook.
Step 4 – Row 2: Chain 6.
The chain 6 at the beginning of each row is creating an increase of one square for that row.

Step 5 – Row 2 Cont’d: Turn your work.
Once again the first 3 chains becomes your foundation stitches and the second 3 chains will be you turning chain. Turning chains are very important in C2C crochet as well will be slip stitching to the turning chains and working Double Crochet around the turning chains.
Step 6 – Row 2 Cont’d: Work Dc into the 4th, 5th, and 6th chain from the hook. Slip stitch to the turning chain of the previous row.
You have created the first square of the second row.

Step 7 – Row 2 Cont’d: Chain 3.
Step 8 – Row 2 Cont’d: Work 3 Double Crochet around the same turning chain that you slip stitched to.
You have completed the second square of Row 2.

Step 9 – Row 3: Chain 6.
Step 10 – Row 3 Cont’d: Turn your work.

Step 11 – Row 3 Cont’d: Double Crochet into the 4th, 5th and 6th chain from the hook. Slip stitch to the turning chain of the previous row.
Step 12 – Row 3 Cont’d: Chain 3.

Step 13 – Row 3 Cont’d: Work 3 Double Crochet around the same turning chain that you slip stitched to. Slip stitch to the next turning chain of the previous row.
Step 14 –Row 3 Cont’d: Chain 3.

Step 15 – Row 3 Cont’d: Work 3 Double Crochet around the same turning chain that you slip stitched to.
This completes Row 3.
Step 16 – Row 4: Chain 6, turn, Work a Double Crochet into the 4th, 5th, and 6th chain from the hook. (Slip Stitch to the turning chain of the previous row, Chain 3, Work 3 Double Crochet around the turning chain you Slip Stitched to.) Repeat from (to) to the end of the row.
Above is the way I will be writing the C2C stitch for patterns. I prefer to write it this way so that it becomes a single row repeat.
When increasing each row will have the same number of squares as the row number.
Row 1 – 1 Square
Row 2 – 2 Squares
Row 3 – 3 Squares
Once you get the hang of this stitch, a project using this stitch will work up quite quickly.
Try out one of these practice patterns to hone your skills.
C2C Celebration Bunting
C2C Winter Shawl
Adding A Single Crochet Border to C2C
The C2C stitch is a beautiful stitch but in can leave a rather unfinished looking edge. In order to make the work more finished or make it easier to work a decorative border into the edge of the C2C project, I recommend adding a Single Crochet Border First.
Video Tutorial
Left Handed Border Tutorial
Working around the edge of a C2C project does not need to be tricky you just need to know the four different area you will be working into and how many stitches to work into them.
Below I have laid out a diagram to show you how I Single Crochet around C2C.
You will be working a Single Crochet into the top and bottom of every Double Crochet Stitch.
(This is shown on the left image)
You will work 2 Single Crochet into every turning chain and into the side of the Double Crochet.
(This is shown on the right image.)

When you Single Crochet around the edge of your work you will slip stitch to any stitch on the edge, Chain 1, and start working along the edge using the guides above.
When you reach a corner, Chain 1 and continue along the next side. Chain at every corner as shown above. Slip Stitch to the first Single Crochet you worked along the edge.

Week 2 – Corner to Corner Crochet Decrease
Learning to decrease allows you to make C2C crochet squares. Follow the photo tutorial below add practice making a 4×4 square. You can also watch the right handed or left handed video tutorial.
Test out the Practice Patterns
I have created two practice patterns help you master how to C2C decrease.
C2C Zipper Pouch
C2C Fingerless Gloves
How to C2C Decrease
Video Tutorial
Right Handed
Left- Handed Tutorial
Photo Tutorial
In the photo tutorial below I have broken down the steps as far as I can and provides both photos and crochet charts to help explain how to corner to corner crochet decrease.

Step 1: Once you have increased using the C2C Crochet method and your project is as wide and as tall as you would like it, it is time to start decreasing. It may help to mark your two corner pieces to help keep track of them and make sure they remain your corners.
Step 2: Row 5: Turn and slip stitch into the last three Double Crochet of row 4. This reduces the number of squares you have in the next row by 1.

Step 3: Row 5 Cont’d: Chain 3, turn.
Step 4: Row 5 Cont’d: Work 3 Double crochet around the turning chain of the previous row. Slip stitch to the next turning chain.

Step 5: Row 5 Cont’d: Chain3, work 3 Double Crochet around the same turning chain that you slip stitched to. Slip stitch to the next turning chain of the previous row.
Step 6: Row 5 Cont’d: Chain3, work 3 Double Crochet around the same turning chain that you slip stitched to. Slip stitch to the next turning chain of the previous row.

Step 7: Row 6: Turn and slip stitch into the last three Double Crochet of row 5. This reduces the number of squares you have in the next row by 1.
Step 8: Row 6 Cont’d: Chain 3, turn.

Step 9: Row 6 Cont’d: Work 3 Double crochet around the turning chain of the previous row. Slip stitch to the next turning chain, Chain3, work 3 Double Crochet around the same turning chain that you slip stitched to. Slip stitch to the next turning chain of the previous row.
Step 10: Row 7: Turn and slip stitch into the last three Double Crochet of row 5. This reduces the number of squares you have in the next row by 1.

Step 11: Row 7 Cont’d: Chain 3, turn.
Step 12: Row 7 Cont’d: Work 3 Double crochet around the turning chain of the previous row. Slip stitch to the next turning chain. Fasten Off.
Now you have completed your 4×4 square sample. If I was writing a the Corner to Corner crochet decrease in a pattern it would look like the row below.
Row 5-7: Turn, Slst to the last 3 Dc of the previous row, Ch3, turn. Work 3 Dc around the turning Ch of the previous row, *Slst to the next turning Ch, Work 3 Dc around the turning Ch of the previous row,* repeat from *to* until you are flush with the top of the previous row.
There are of course there are other ways to write this, but this is how you will see it in my patterns. Another way someone could write a C2C pattern is to say, “Increase for the first 4 rows then decrease until you have a completed square.”
I have created two practice patterns help you master how to C2C decrease. Test them out.
C2C Zipper Pouch
C2C Fingerless Gloves
Share you sample swatches and practice patterns with the Our Crochet Journey Fb Group.
Week 3 – Let’s Make a Rectangle
This week we will learn how to make a corner to corner crochet rectangle.
Knowing how to crochet a corner to corner rectangle will allow you to make banners and throw blankets.
C2C Rectangle Practice Patterns
The Snowman Scarf
Quick Textured Headband or Earwarmer
Again, if the patterns don’t suit your fancy, that is ok! Just make a sample Corner to Corner rectangle swatch and share that with us on the Fb Group.

For this part of the tutorial, I am going to assume that you have already learned how to C2C increase and decrease. If you have mastered that, then you already know everything you need to make a Corner to Corner Crochet Rectangle.
All you have to do to create a rectangle is alternate between increasing and decreasing at the beginning of every row.
Once you complete the first two or three rows of the rectangle portion it will become easy to identify if you need to increase or decrease at the beginning of the next row.
C2C Rectangle Video Tutorial
Left Handed Video Tutorial (The Video Cover may say Right Handed but it is actually left handed oops!)
Step1: Row 4:For the photo tutorial we are starting at the same spot we left off from the increase photo tutorial. So far we have increased for 4 rows.

Step 2: Row 5: Turn and slip stitch into the last three Double Crochet of row 5. This allows us to continue working in the direction of the arrows. On this side of our rectangle we will always decrease.

Step 3: Row 5 Cont’d: Ch3 and turn your work.
Step 4: Row 5 Cont’d: Work 3 Double crochet around the turning chain of the previous row. (Slip stitch to the next turning chain, Chain3, work 3 Double Crochet around the same turning chain that you slip stitched to. Slip stitch to the next turning chain of the previous row.) repeat from (to) until then even with the last square of the previous row. Basically, Work the next 3 squares the same way you would in the other tutorials.

Step 5: Row 5 Cont’d: If we were decreasing we would move to the next row at this point, but since we are making a rectangle we want to make sure we continue moving in the directions of the arrows. To do this, Ch 3 and work 3 Dc in the top turning chain. Already you can see we are losing our square shape and creating a rectangle.
Step 6: Row 6: For Row 6 and all your even row you will increase at the beginning of the row. Ch6 and turn your work. This will keep our progress moving in the direction of the arrows.

Step 7: Row 6 Cont’d: Work 3 Double crochet around the turning chain of the previous row. (Slip stitch to the next turning chain, Chain3, work 3 Double Crochet around the same turning chain that you slip stitched to. Slip stitch to the next turning chain of the previous row.) repeat from (to) until then even with the last square of the previous row.
Step 8: Row 7 and Beyond: Since row 7 is an odd row you will begin the row by decreasing and then work 4 ‘squares’.
For Row 8, since it is an even row, you will increase at the beginning of the row and work 4 squares.
We are work 4 squares because that is the width of the smallest portion of our rectangle and that number should remain constant.
Tip: If you lose count of your row, just try increasing at the beginning of that row. After work one or two squares look at your rectangle. Does it look correct? If not go back and try a decrease instead. It should be obvious if you picked the wrong one or if you worked on extra square at the end of the row.
Don’t forget to test out the practice patterns to really improve you skills.
The Snowman Scarf
Quick Textured Headband or Earwarmer
Share you sample swatches and practice patterns with the Our Crochet Journey Fb Group.
What Next
This Crochet a long is designed to only cover the basics of C2C crochet. We still need to learn how to read a graph, how to make a graph, how to change colors, tips and tricks for working with graphs and so much more.
It sounds like another Crochet A Long is in the future!
I already have a 28 day Crochet Stitch Challenge planned for February this year. I will be brainstorming ideas for another Crochet A Long for the more advanced C2C lessons to share in March.
Make sure you join my tin nhắn hộp thư online newsletter to keep in touch with everything that is happening at Winding Road Crochet!

If you are interested in trying out C2C charts on your own, keep an eye out for my mini crochet charts. I am releasing one mini crochet chart each month this year. Add grab my Printable Yarn Bobbins to keep your yarn from getting tangled.
These charts can be used to make a washcloth or potholder and are super cute! I will link them below as they are released.
Test out all the other free crochet patterns at Winding Road Crochet.
Here are some of my favorites. (Click the photo to be taken to the pattern.)
Let’s Kết nối
Want to know what I am making next? Follow me on Instagram @windingroadcrochet to see sneak peeks of what I am up to and to be notified of when I release new free patterns. You can also follow me on Pinterest and Fb. Join our facebook group Our Crochet Journey and be a part of our community. Share, photos, ask for help and be inspired all in one place!
Written pattern, tutorials, graphs and pdfs of the How to Corner to Corner Crochet for Beginners are copyright Windingroadcrochet.com. Please do not reprint or repost this content as your own, but please feel free to share this link with others. You can find more information on sharing my work with others in the Terms and Conditions Page.
Please follow and like us: